Provides infrastructure layer compute capabilities, including both bare metal and virtual servers with various optimizations includins compute, memory, IO, and disk. Also supports accelerations options such as GPUs, FPGAs, Inferentia and Trainium.
Provides image recognition capability for images (in batch or real-time) and video that provides a analysis of the content such as real-world objects, faces, celebrities, and path mapping.
Provides a publish/subscribe notification service with multiple subscription types including Amazon Simple Queue Service (SQS), Amazon Kinesis Data Firehose, AWS Lambda, generic HTTPS endpoints, SMS and email.
A serverless, fully-managed, message queue service that supports producing, store, and consuming messages and enables loose coupling between applications.
Provides private networking capability spanning multiple availability zones and supporting subnets, routing, network access control groups, security groups and gateways.
Provides tracing of service invocations in distributed applications for observability, allowing users to diagnose issues or optimize their service interactions.
All about Cloud, mostly about Amazon Web Services (AWS)
Amazon WorkSpaces Simple Setup
2020-02-22 / 814 words / 4 minutes
Lots of the work done in the cloud is for running servers. We setup web servers (such as Apache), application servers (such as Apache TomCat or RedHat JBoss) and database servers (such as PostgreSQL or MariaDB). Amazon Web Services provides lots of options in this space, but sometimes end users need productivity tools for interactive use. Fortunately, AWS has an entire service category devoted to End User Computing. In this article we’ll do an Amazon WorkSpaces simple setup to see just how quickly we can get a Microsoft Windows desktop up and running.
Amazon Workspaces Simple Setup
There are several steps in this process. The first steps are performed in the AWS Console and the last few involve downloading a client and entering credentials sent over email.
The AWS Console for Amazon Workspaces
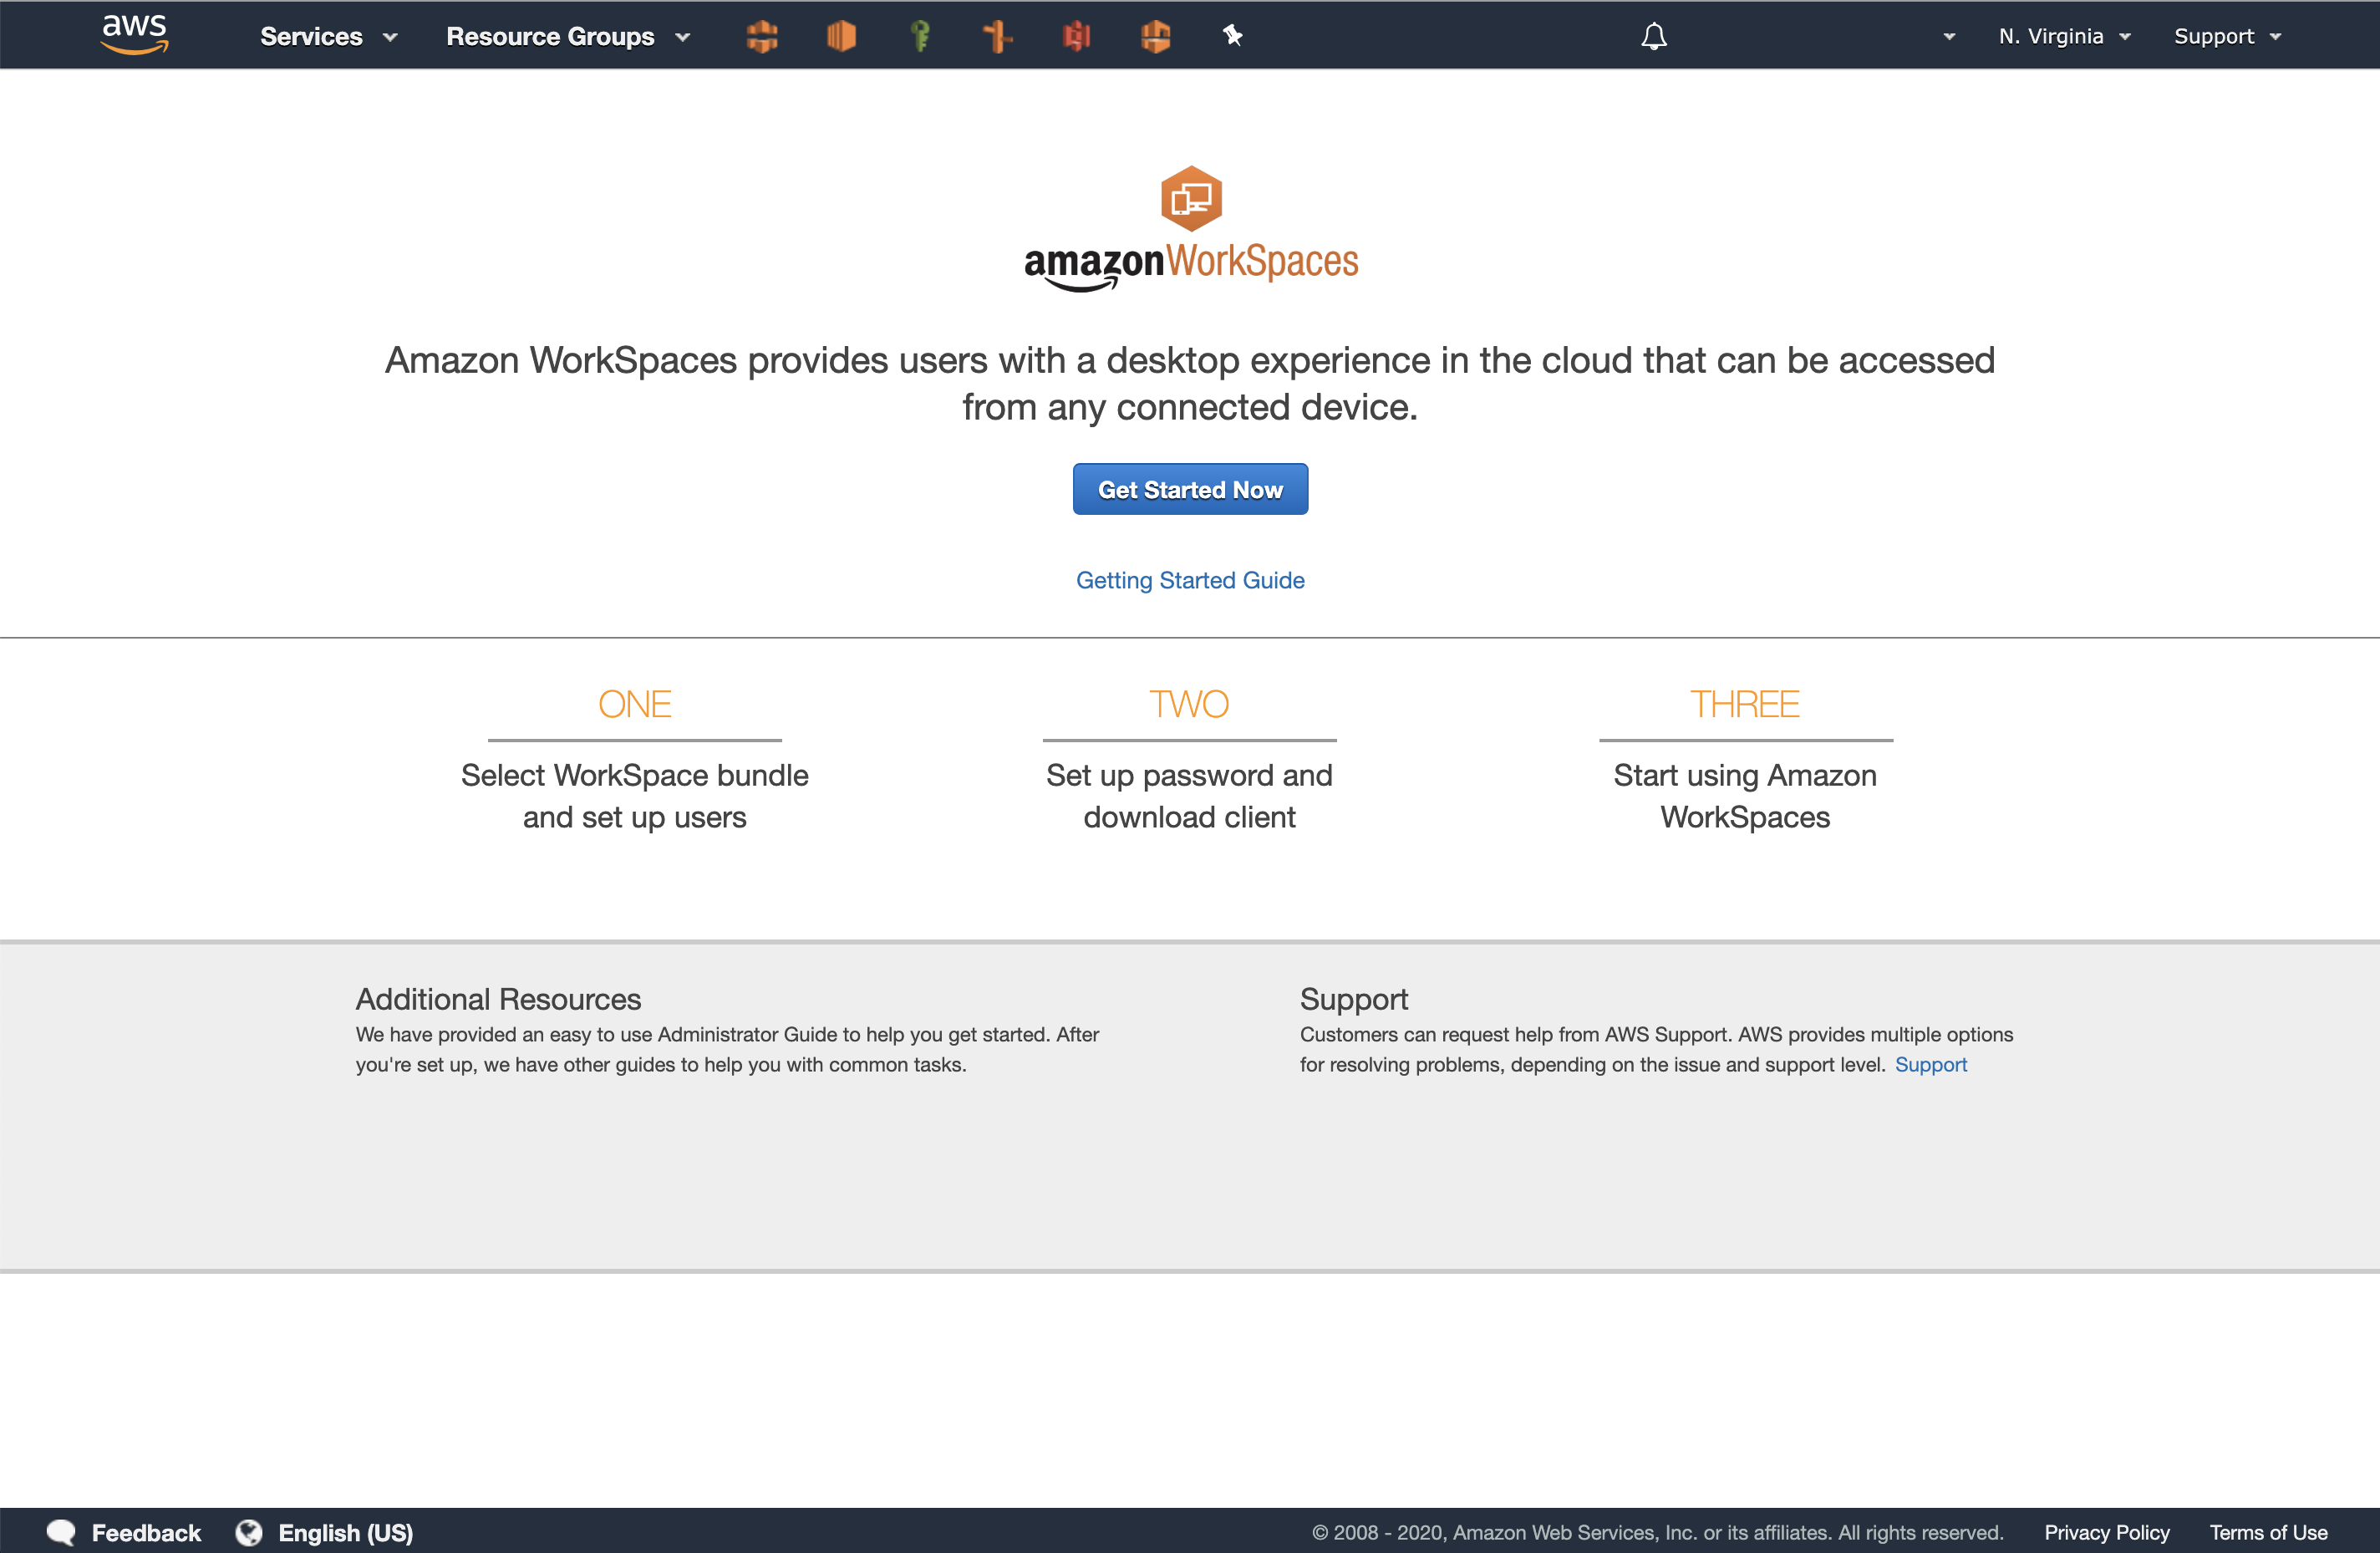
For this example, we’ll work exclusively with the AWS Management Console. After opening the AWS Console, select Amazon WorkSpaces. With many AWS service console pages, there is a welcome screen that is displayed if the service has not been used before. The screen provides an explanation of the service itself, “Amazon Workspaces provides a desktop experience in the cloud that can be accessed from any connected device”. It also contains a brief overview of the steps required to create an Amazon Workspaces system:
Select WorkSpace bundle and set up users
Setup password and download client
Start using Amazon WorkSpaces
The page also includes links to the Getting Started Guide and additional resources. If you have ever worked with Amazon Workspaces in the past, you may not see this page.
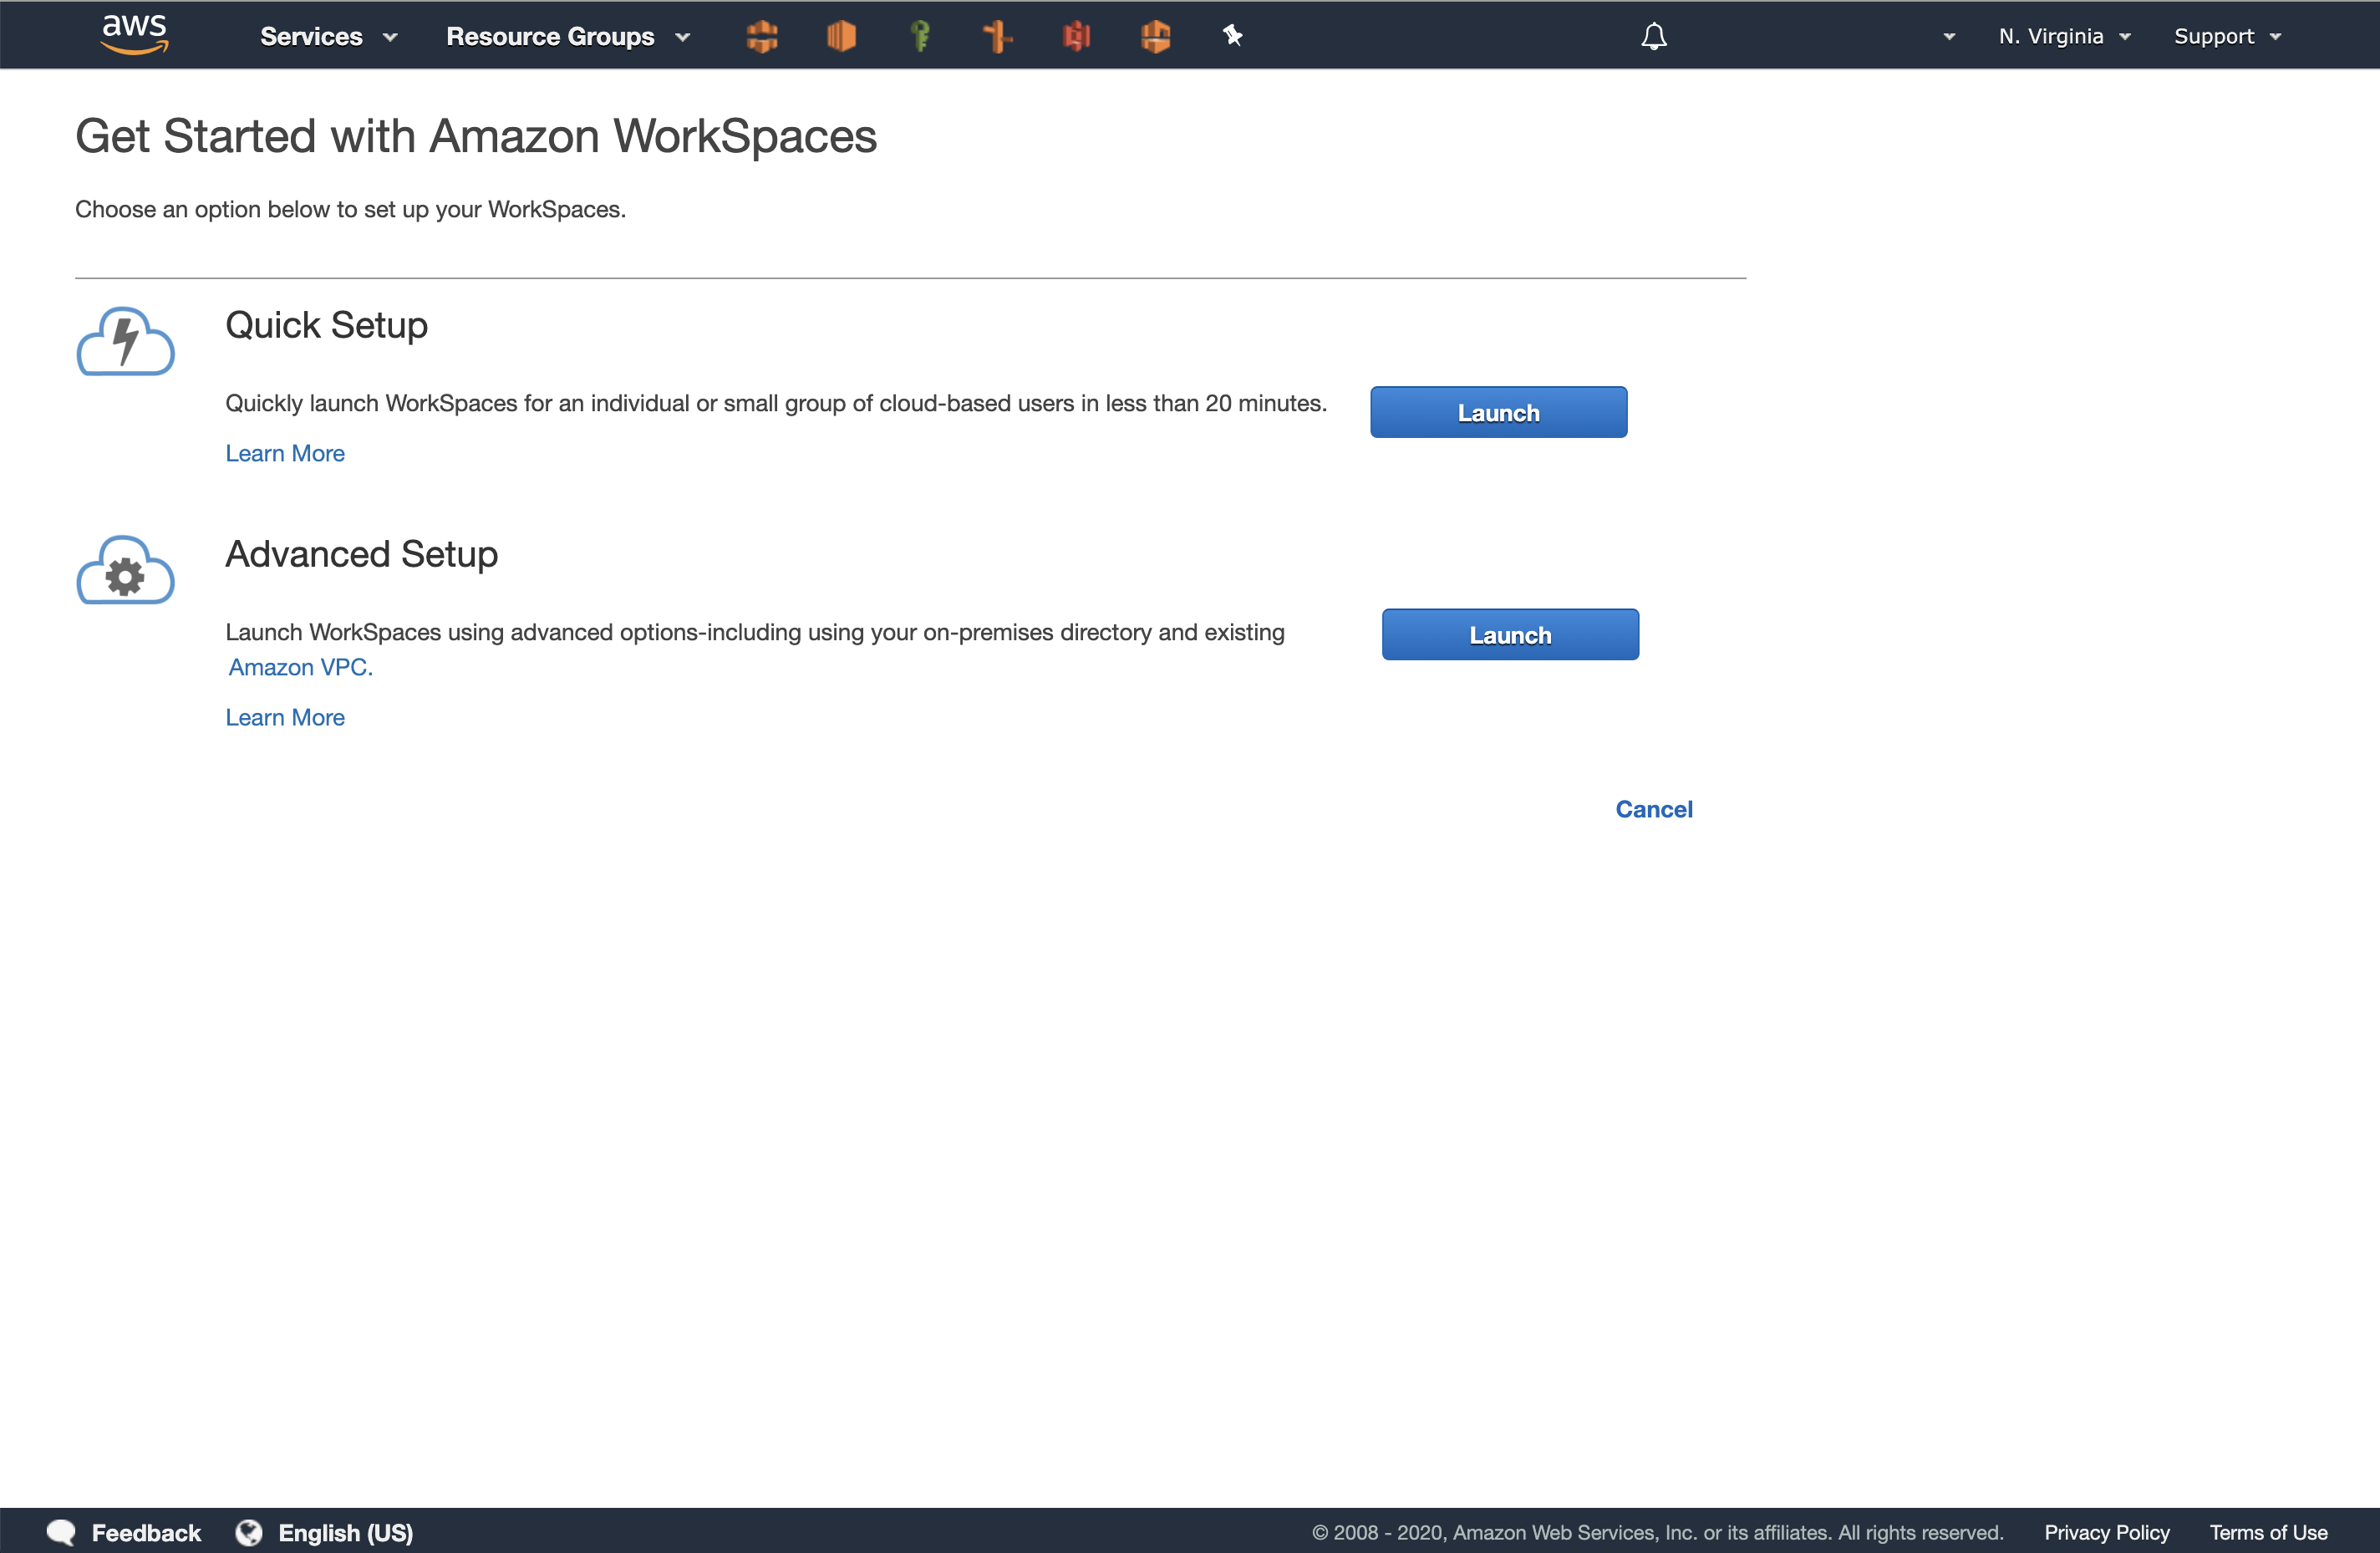
Selecting Quick or Advanced Setup
Amazon Workspaces offers two setup modes:
Quick Setup
Advanced Setup
For the purposes of this exercise, which is to see how quickly we can get a Microsoft Windows desktop running, we select the quick setup.
Selecting the Bundle
The next screen asks us to select the bundle. The bundle allows the selection of the operating system, the number of virtual CPUs (vCPUs) and the amount of RAM. Some bundles are aimed at high-end graphics processing users and contain hardware acceleration for image rendering. Costs increase as the specifications increase. For the purposes of this exercise, we select a “free-tier eligible” Standard Windows 10 bundle.
We also add user details on this page. The consists of a username, first name, last name and email address. When the “Launch WorkSpaces” button is pressed, an email is sent to the provided email address with details of how to access the WorkSpace.
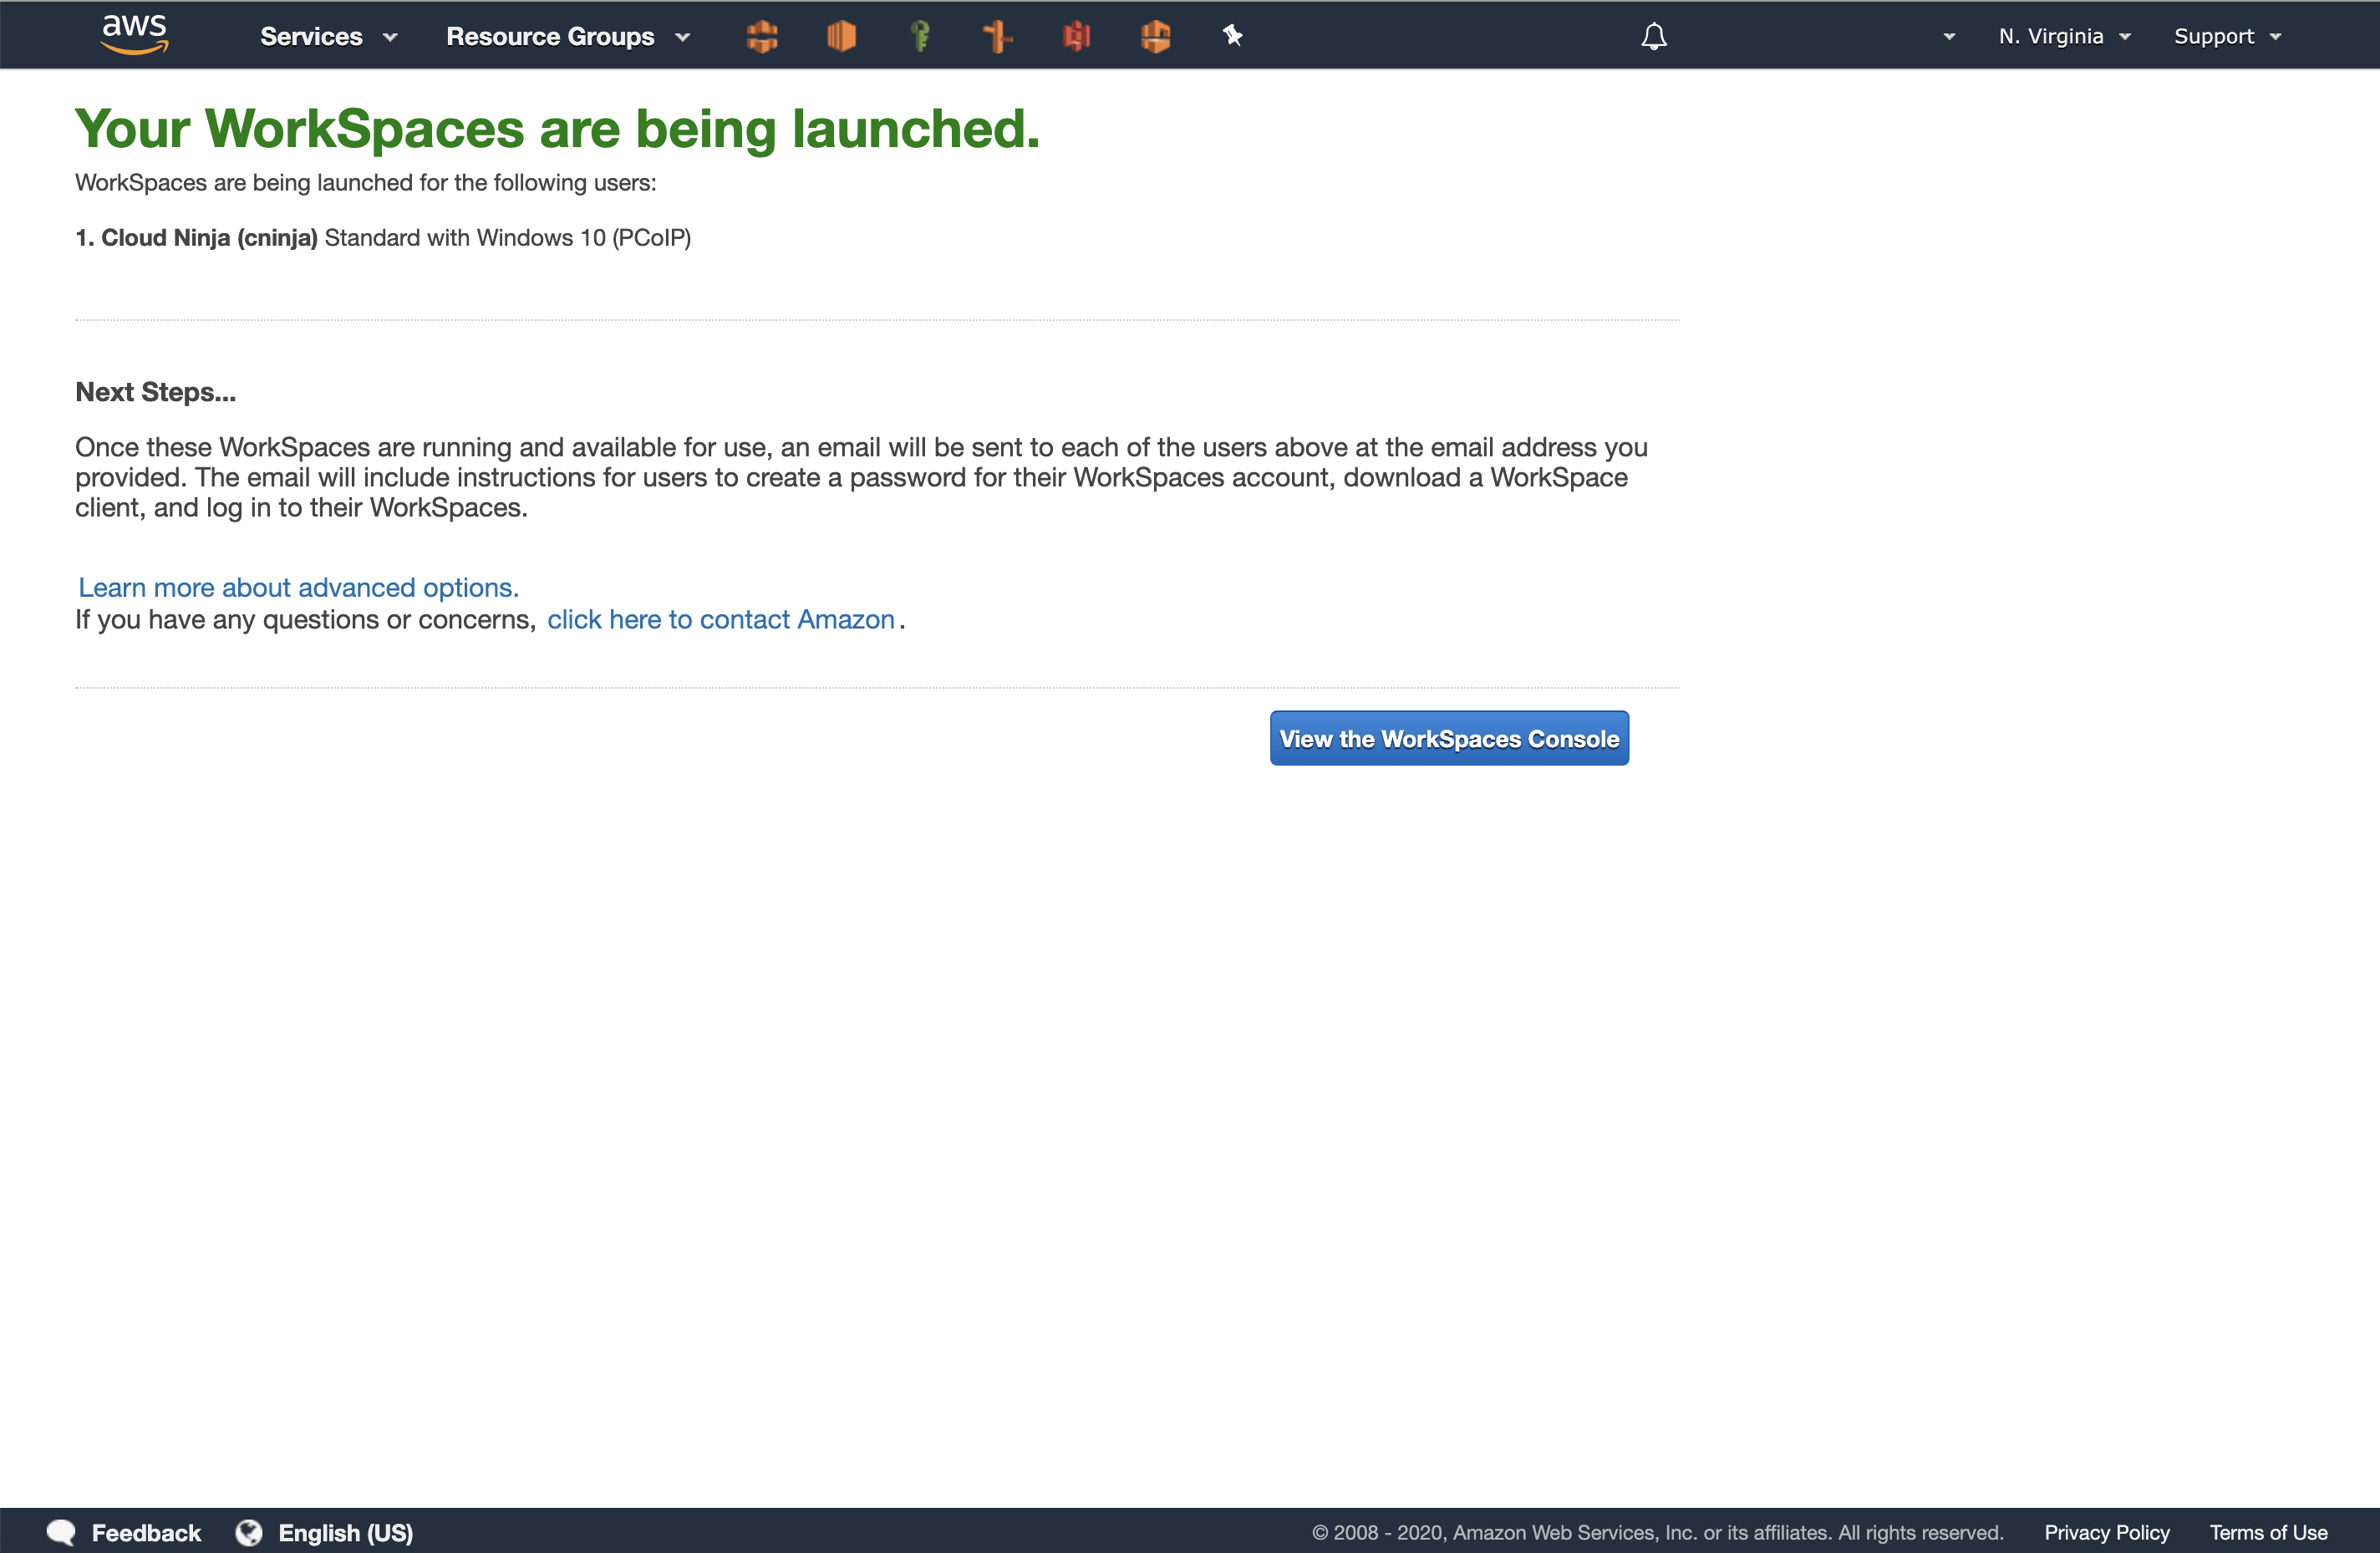
The Launch Page
This page provides confirmation that the WorkSpaces are being launched. It provides a list of the users that are having workspaces created for them and the bundle that is assigned to each user. It provides a useful validation that the everything is configured as expected.
The screen also displays the next steps: Once these WorkSpaces are running and available for use, an email will be send to each of the users above at the email address you provided. The email will include instructions for users to create a password for their WorkSpaces account, download a WorkSpace client, and log in to their Workspaces.
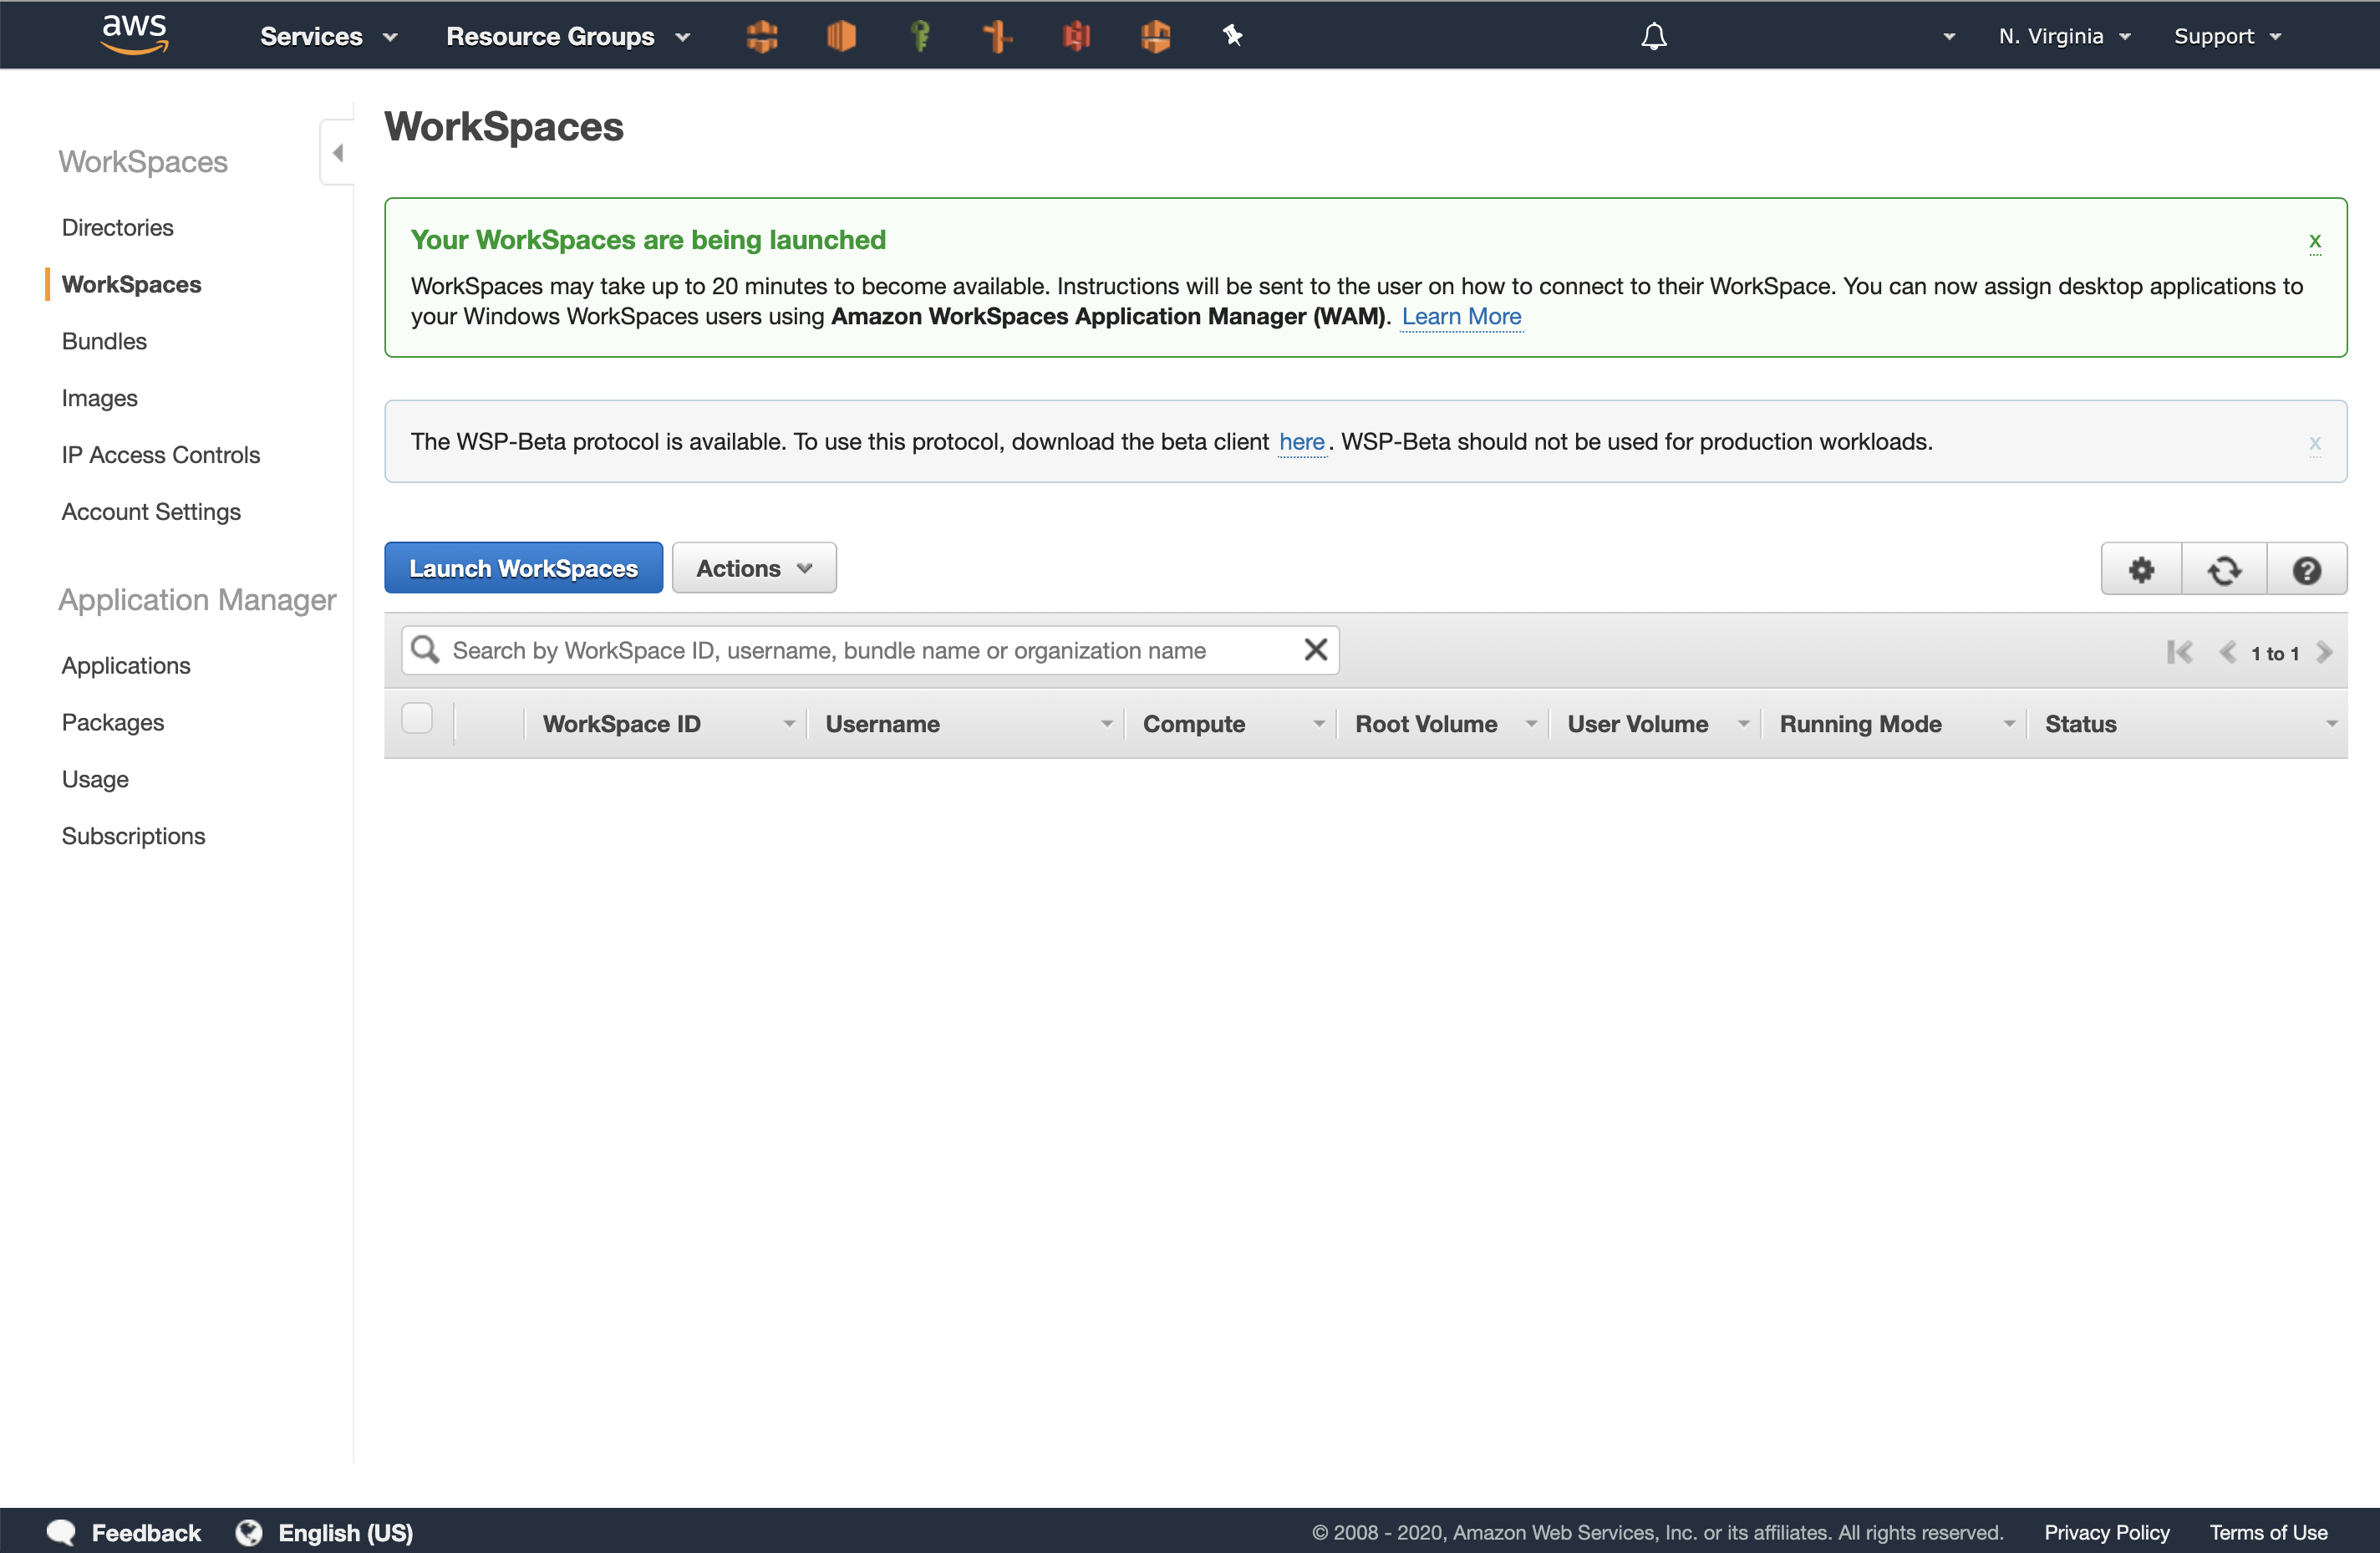
Workspaces (Empty)
If you immediately opt to “View the WorkSpaces Console”, it can appear empty!
You will be greeting with a message informing you that it may take 20 minutes for the Workspaces to become available and that an email will be sent to the user with instructions on how to connect to the Workspace.
The message concludes with: You can now assign desktop applications to your Windows Workspaces users using Amazon WorkSpaces Application Manager (WAM). Since the purposes of this exercise is to see how quickly we can get a Microsoft Windows desktop running we’re going to skip this optional step.
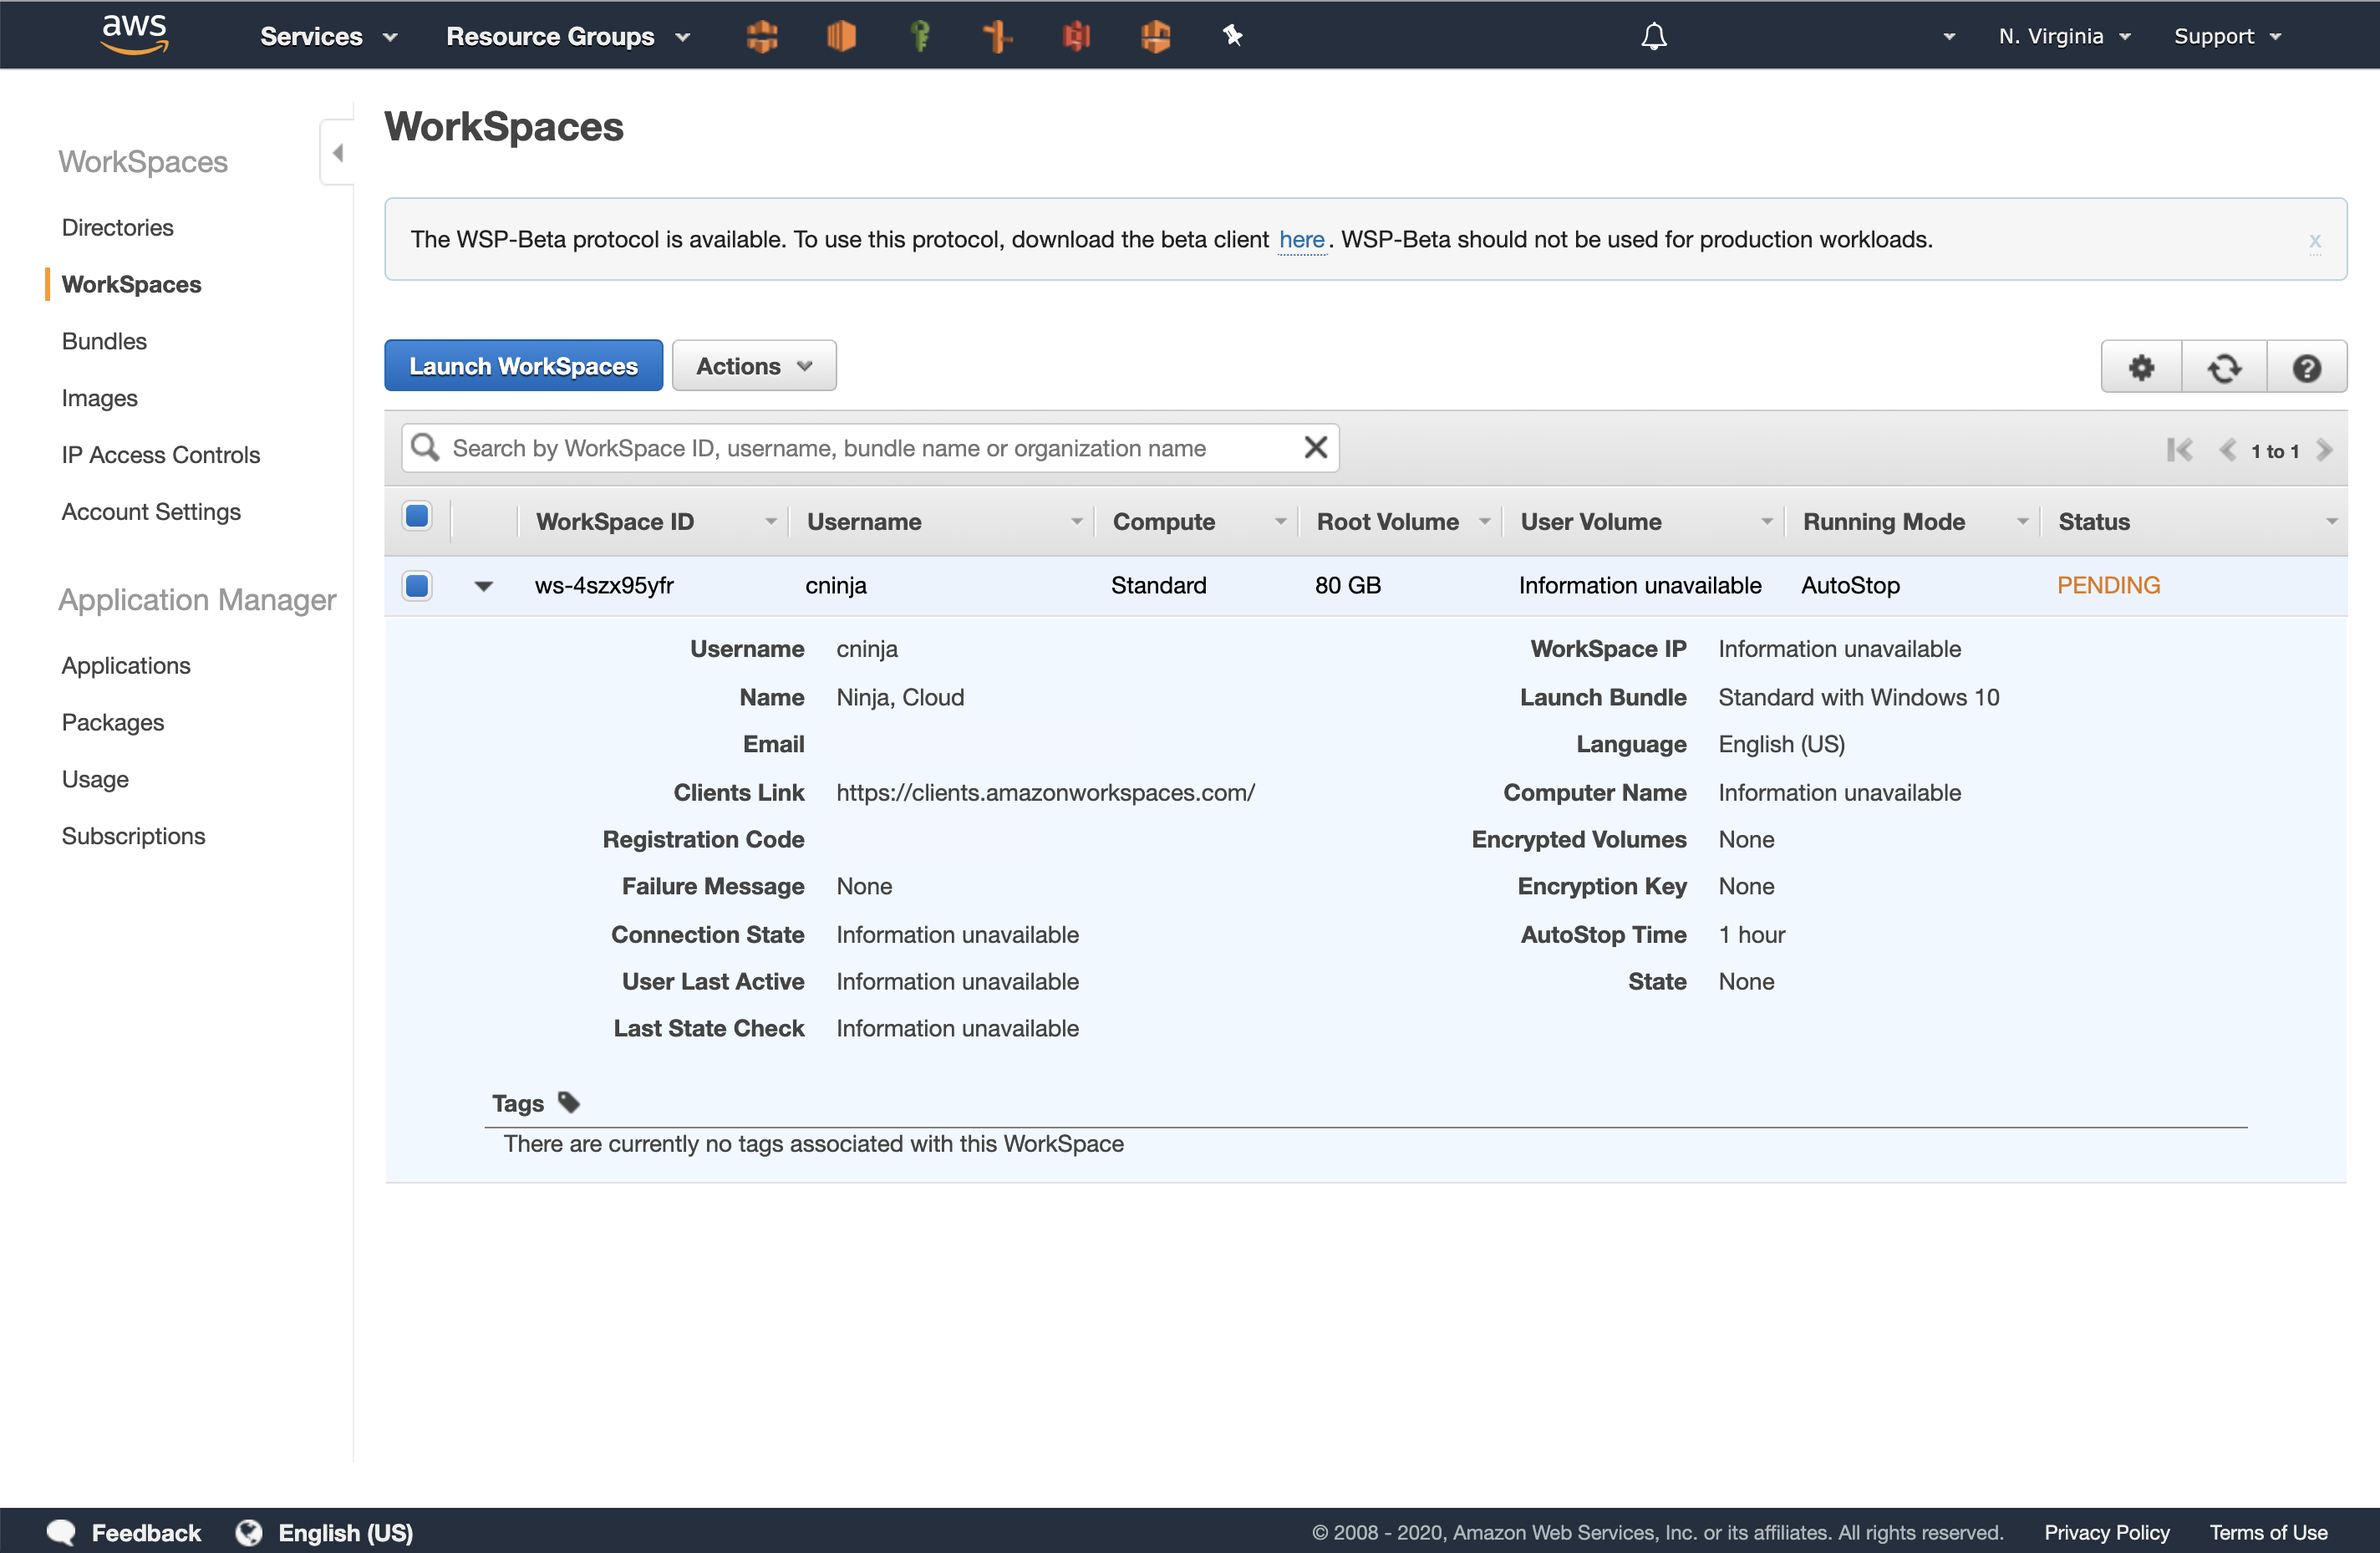
Workspaces (Details)
After a few seconds, the newly created WorkSpace appears on the console showing the Workspace-ID, Username, Compute type, Root Volume Size, any User Volume, the Running Mode and the Status.
Clicking on the down-pointing triangle expands the WorkSpace details. These details include the email address of the user assigned to the workspace, the URL for accessing the client software and the registration code, which is used to login to the client. The “AutoStop” time is the amount of time the WorkSpace will run idle before it is shutdown.
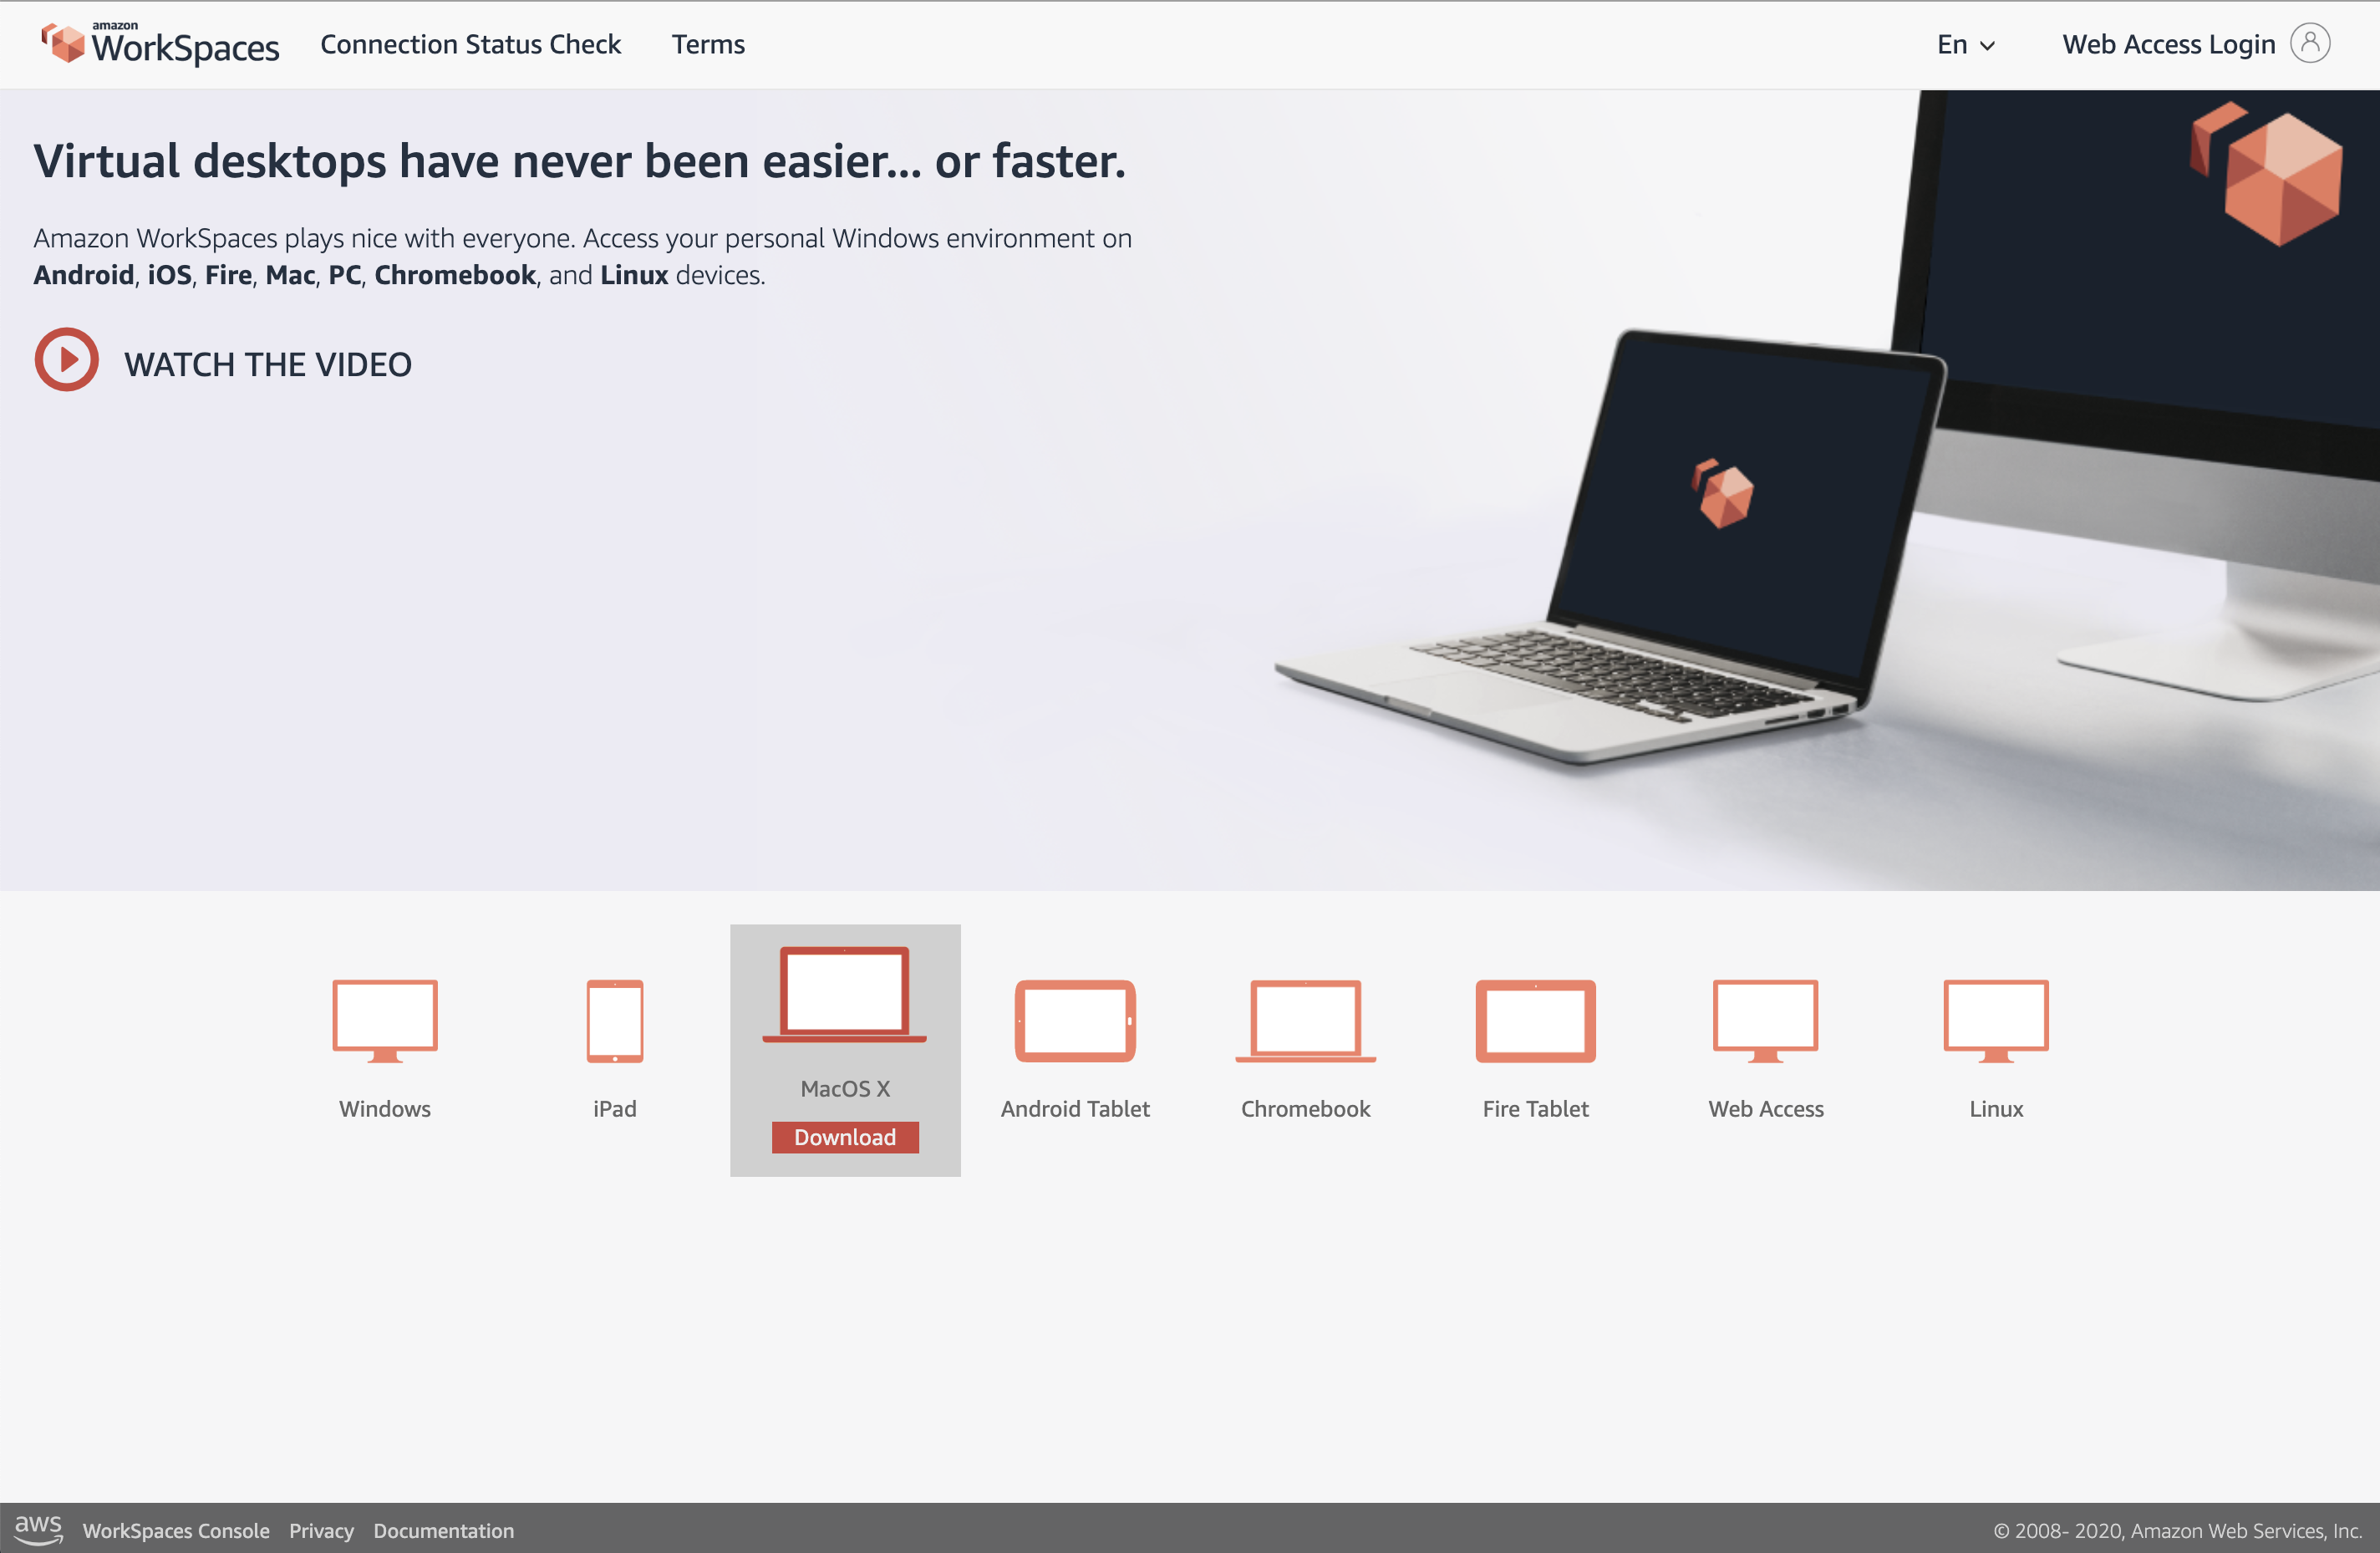
Downloading the Client
The email address specified earlier is sent an email with:
The password for accessing the WorkSpace
A link for downloading the WorkSpaces Client software.
Selecting the link will open the page below. In this example, we’re downloading the client for a Mac desktop.
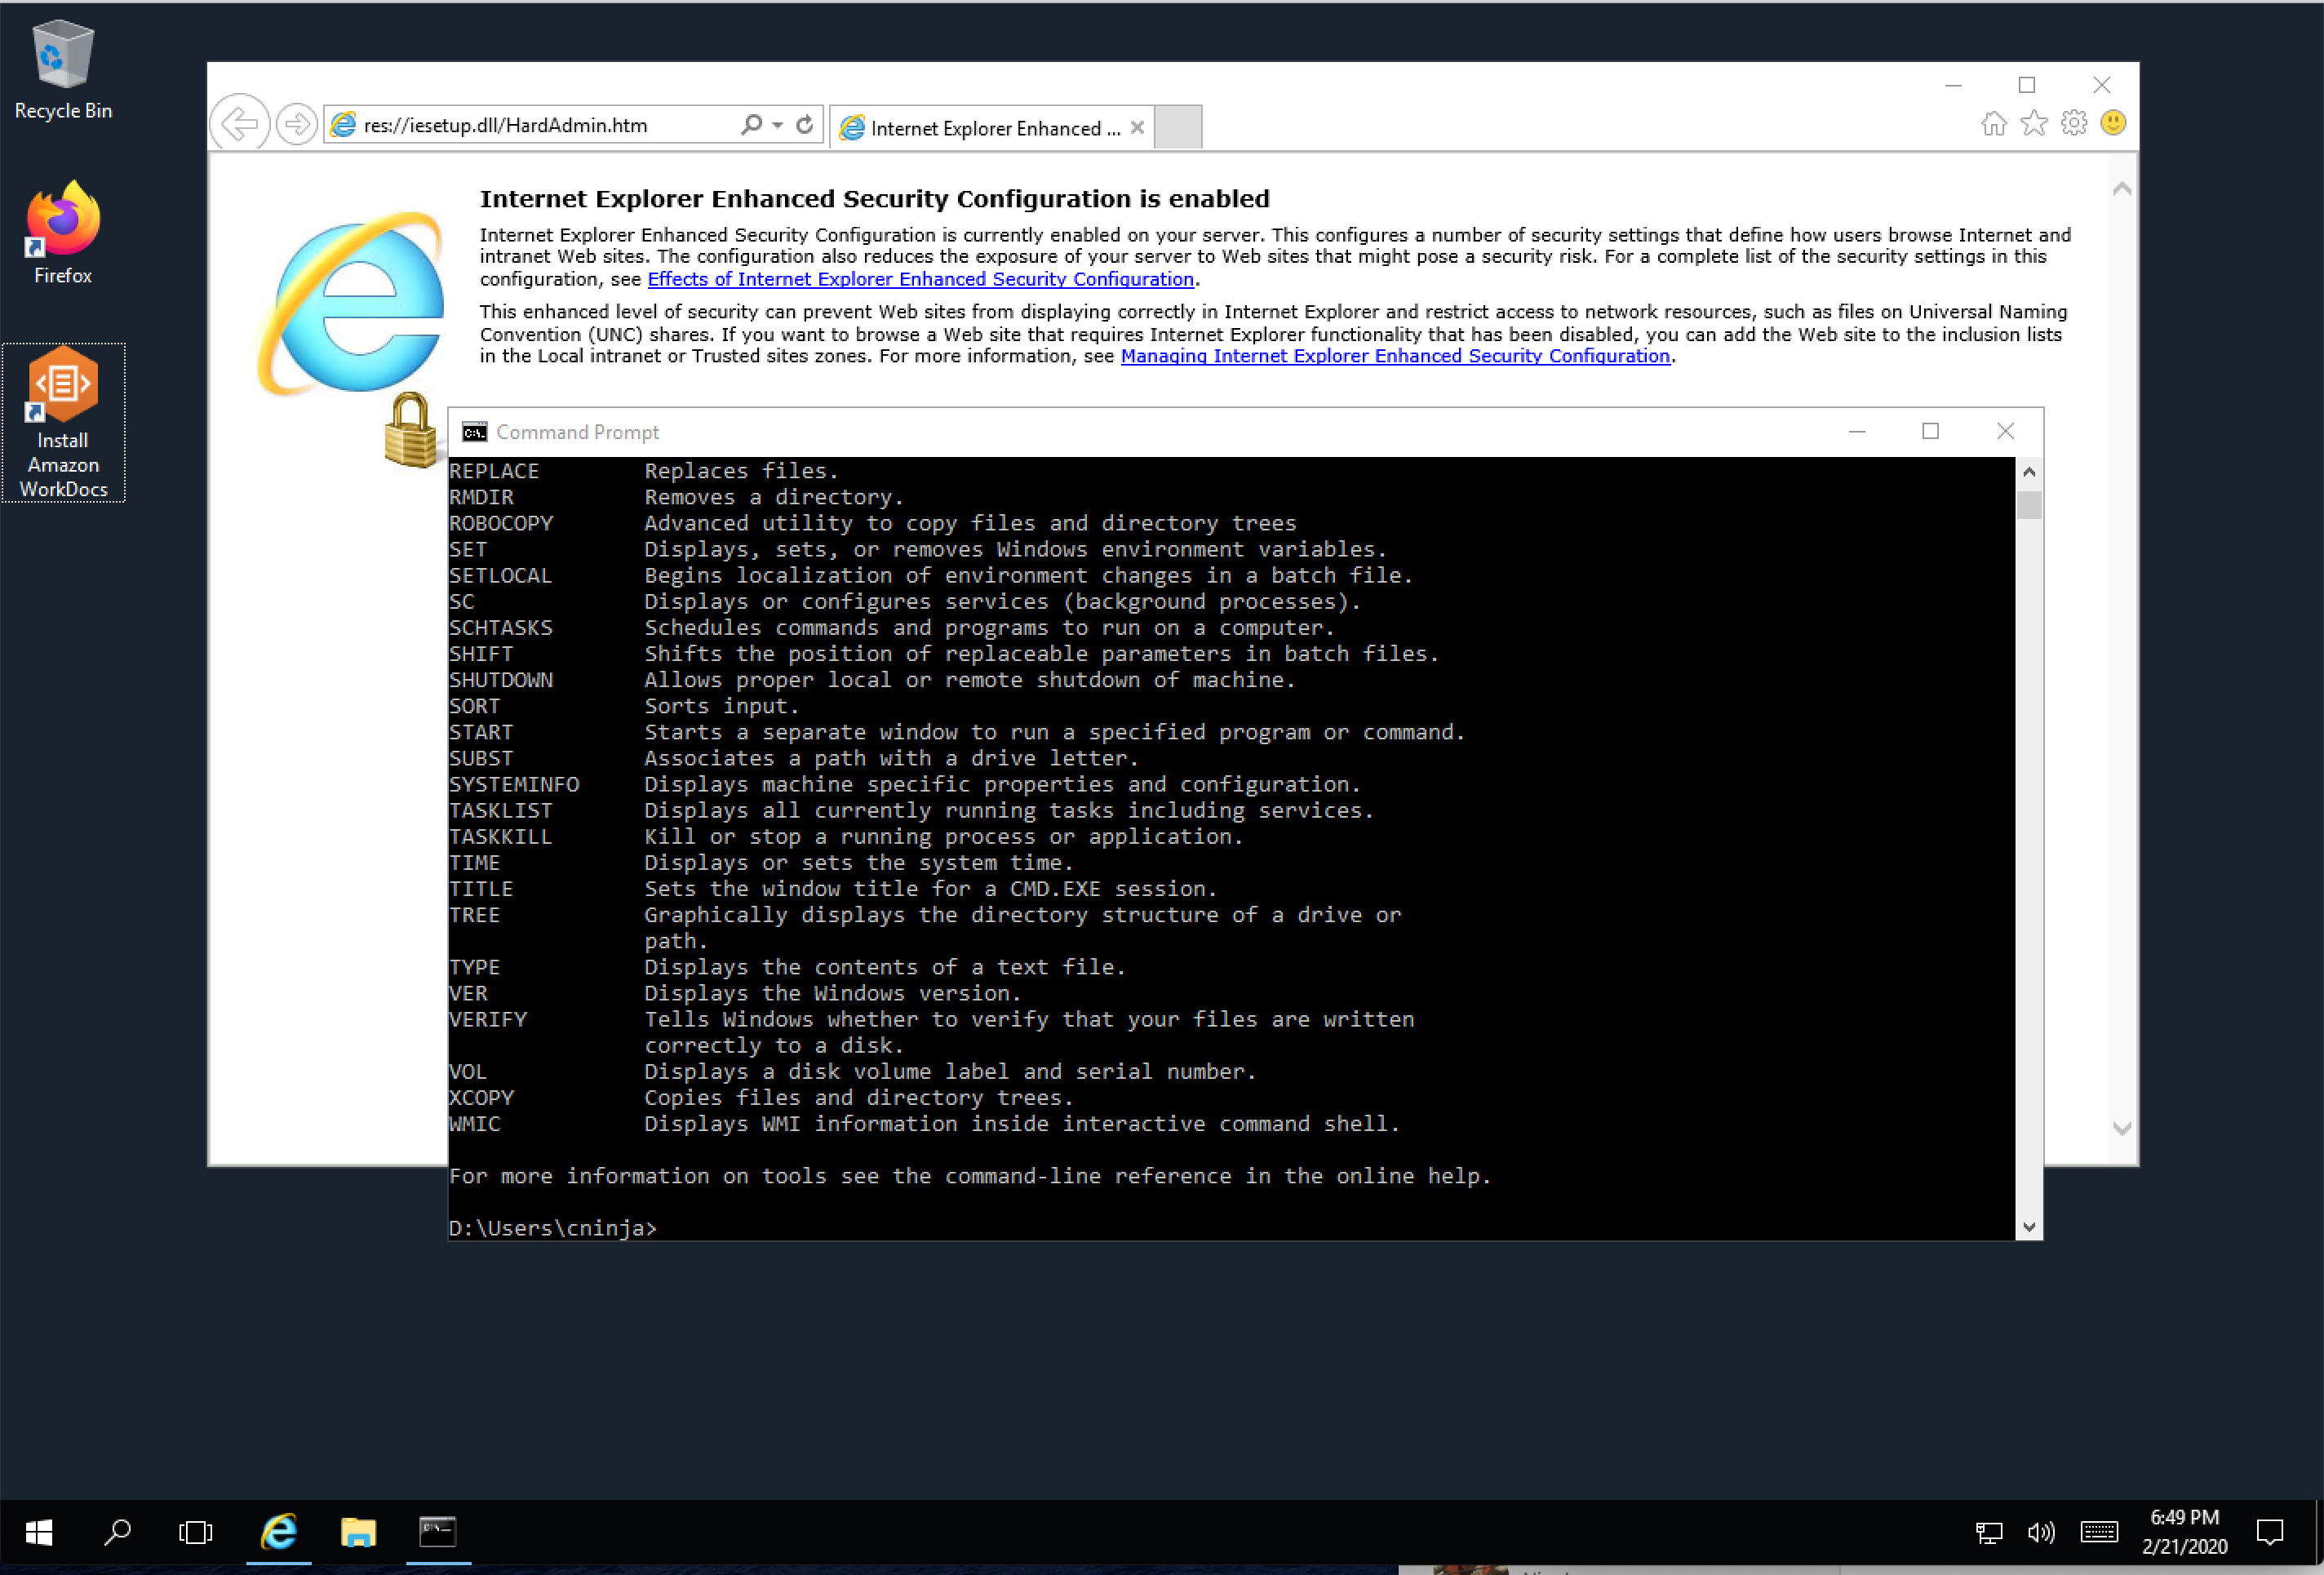
Windows Desktop in Use
After downloading the software and entering the registration code, and the password from the email, we get a Windows Desktop.
The entire process took just a few minutes (not the 20 minutes stated on an earlier screen), and most of that time was spent waiting for the WorkSpace to be created.
All data and information provided on this site is for informational
purposes only. cloudninja.cloud makes no representations as to accuracy,
completeness, currentness, suitability, or validity of any information
on this site and will not be liable for any errors, omissions, or
delays in this information or any losses, injuries, or damages
arising from its display or use. All information is provided on an
as-is basis.
This is a personal weblog. The opinions expressed here represent my
own and not those of my employer. My opinions may change over time.